

We know you've got a lot of plans this 2014! Why not make a craft, do some
art... as a good start! This project is for all those dreams that need to
be saved up for. Just fill up to fulfill! It's
perfect for children and hobbyists alike. It's really fun to make together and
also great to give as a gift to someone special. We want you to enjoy making this very doable project made by Papemelroti artist Patsy Paterno.
Please click on the images to enlarge.
|
balloons scissors paper strips toilet paper rolls paintbrush |
white glue water plastic cup masking tape stick |
paint bit of rope acrylic paint cutter pencil |
How to do it:
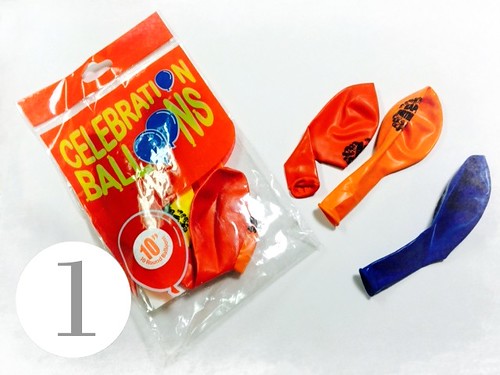 |
1.
Gather your materials.
The items we chose are easily found in local shops selling arts and crafts shops or party supplies. Any type of balloon will do though the thing to remember is that the size of the pig will be the same as the largest size possible of the blown up balloon. The color of the balloons don't really matter since these will be painted over. |
 |
2.
Inflate the balloon.
It will sound a little like this ppsssfffffffffsssshhh!
*Do make sure that with the
steps after this, you have a protective covering over the
area you are working on to prevent anything to be painted on
accidentally.
|
 |
3.
Make the sticky mixture, cut the paper into thin strips and
put together.
Use 1:1 ratio of glue and water for the sticky mixture. You may use newspaper as it is the most economical. Strips of about 1/4 inch width would be good. Mix it up in a plastic cup with a stick. |
 |
4.
Spread the strips along the surface of the balloon using the
mixture as the adhesive.
This will be the pigs "body". The smoother the surface, the nicer your pig will be! |
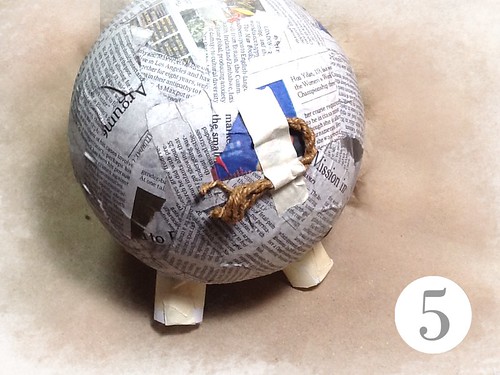 |
5.
Attach the tail.
Use a bit of rope and insert the edge of the "tail" under the back before it is totally covered up in the strips. |
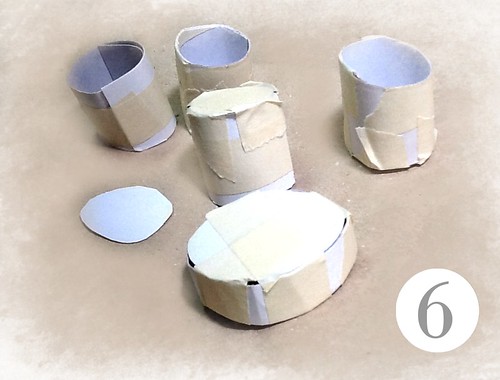 |
6.
Make the snout and legs.
Cut the toilet paper rolls to make some cylindrical shapes. You can also use cardboard instead of toilet paper rolls - just use masking tape to make the cylinders. Use cardboard for the snout. |
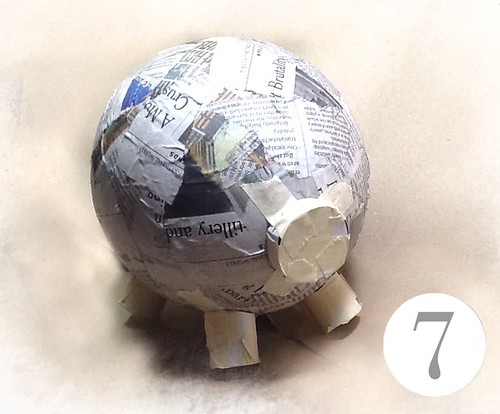 |
7.
Attach the snout and legs.
Use masking tape to secure the parts to the pig "body". The snout can go over the part where the balloon is tied together to hide it. |
 |
8.
Paint over the pig.
Use your paintbrush to cover the whole pig with white acrylic paint, including the snout and legs. Let dry. |
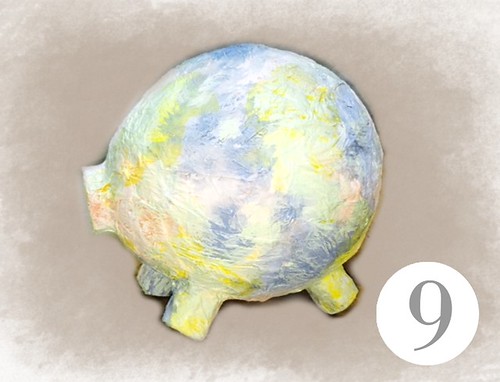 |
9.
Color the pig.
This part is soooo much fun! You can go wild painting all the colors of the rainbow.
At this point you can
already mark with a pencil where you wish to put the hole to
make this into a bank. Use your cutter to make the
hole. It can be 2" long and 1/4 inch wide.
|
 |
10.
Paint some more!
The pig has a lot more color now. You can even use different textures so as to create a grungy effect. |
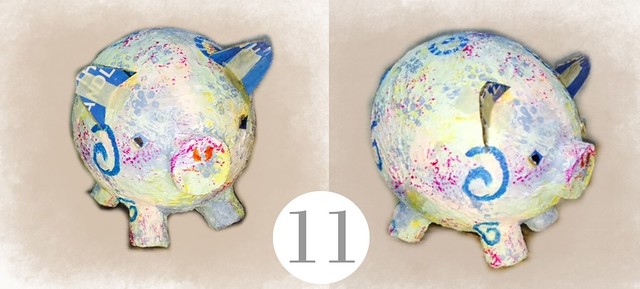 |
11. Attach the ears! Don't forget this (we almost did!) Use the same method |
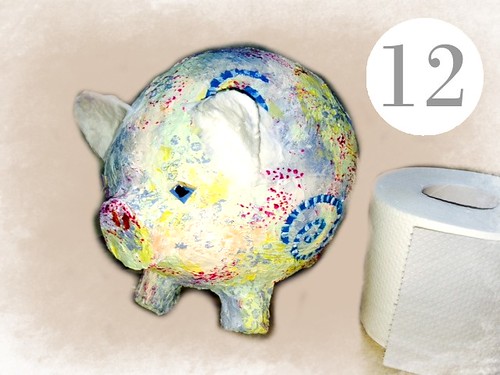 |
12.
Paint ears with gouache.
Take a look and see! She pig has a lot more color now. You can even use different textures so as to create a grungy effect. |
 |
13.
Decorate and write
If you look closely at the images on the left, you can will see writings on the pig. Top it off with a beautiful ribbon. |
See more crafts at the


How many pages of newspaper did you need for this bank? And for what balloon diameter---is the pig say 8 inches wide or more?
ReplyDeleteThe pig is about 6" in diameter, and I only used one newspaper.
DeleteYou can make the pig any size you want depending on the balloon you buy.
The thicker you make the newspaper layers, the stronger will be your pig.
This blog is used to get more savings on your online purchases Coupon Code at topincoupons.com
ReplyDelete